


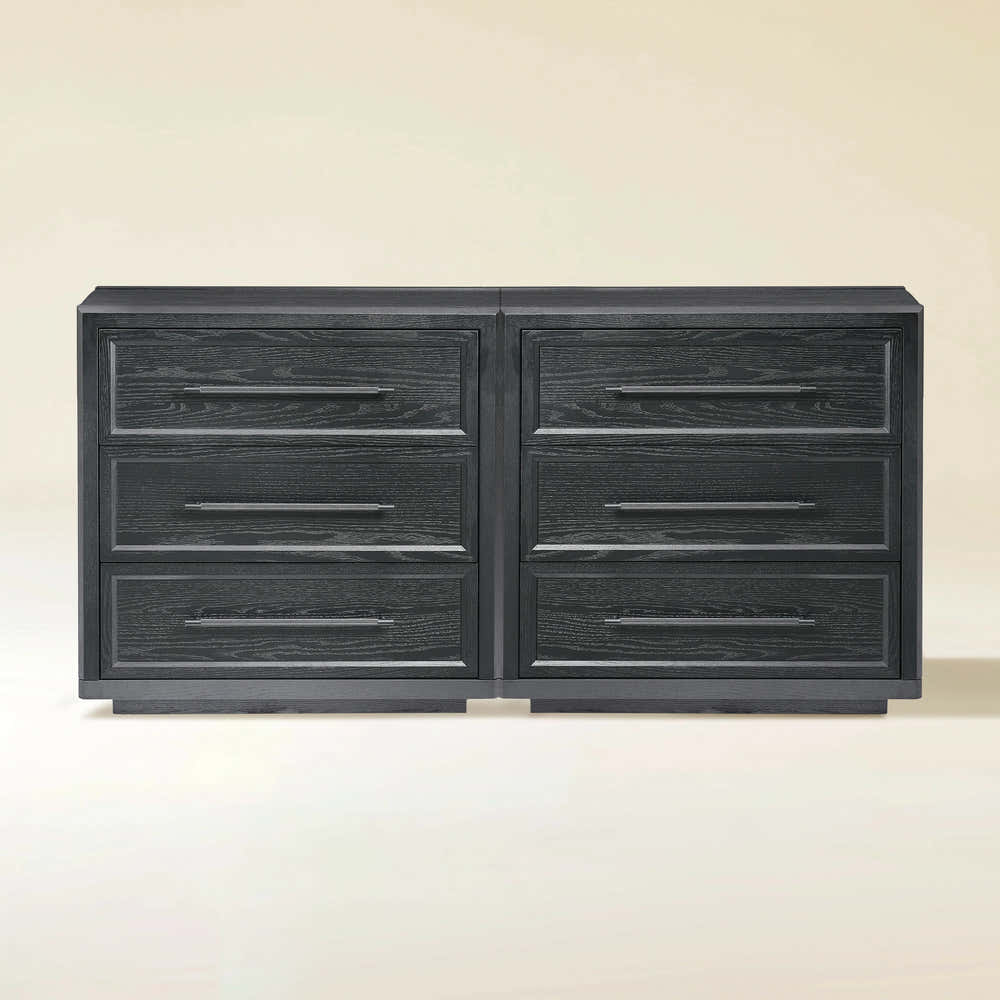
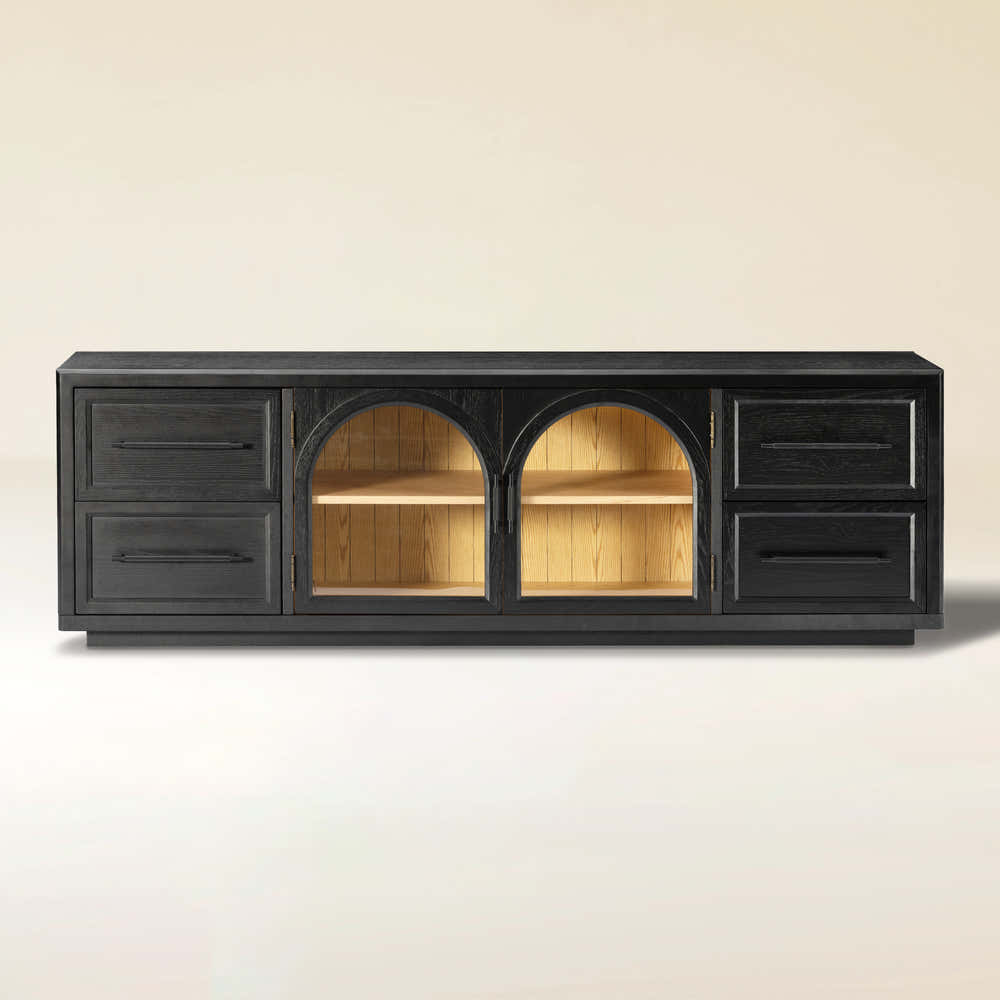
Alvar 61″ Oak 6-Drawer Chest(Set of 2)


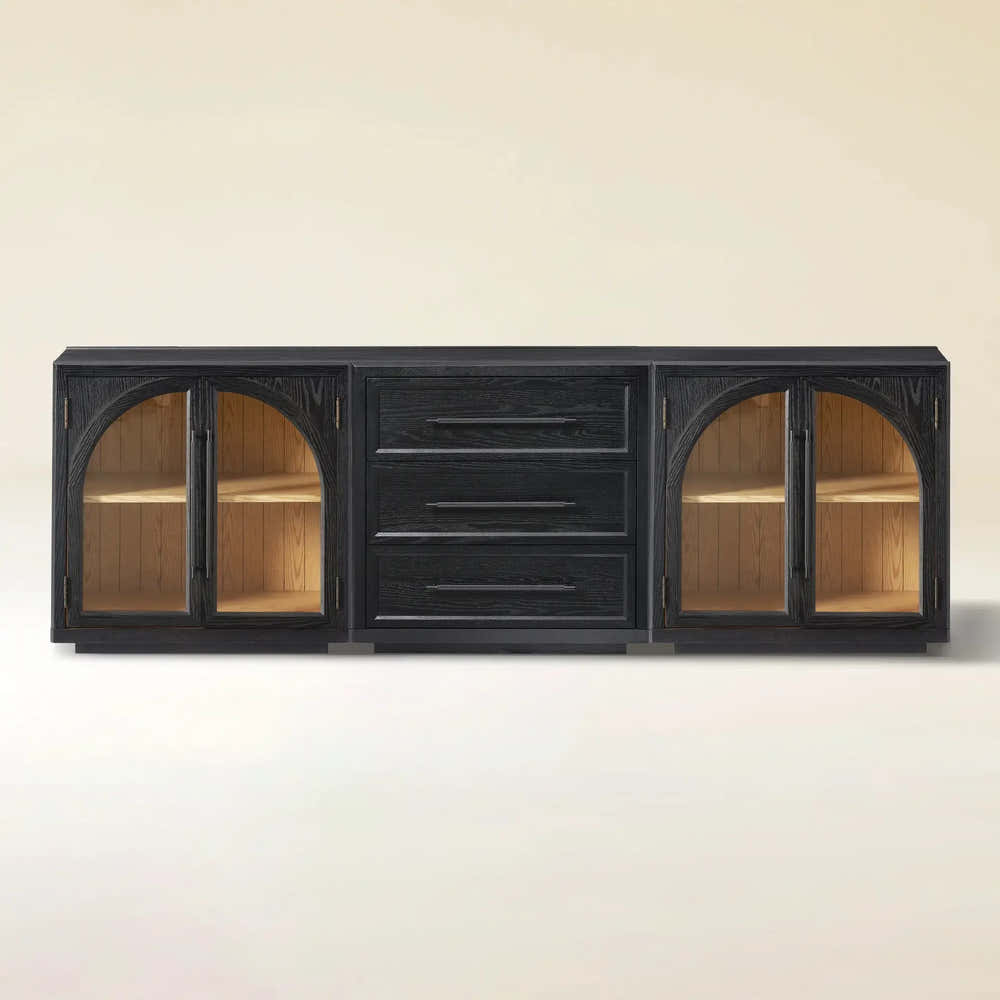
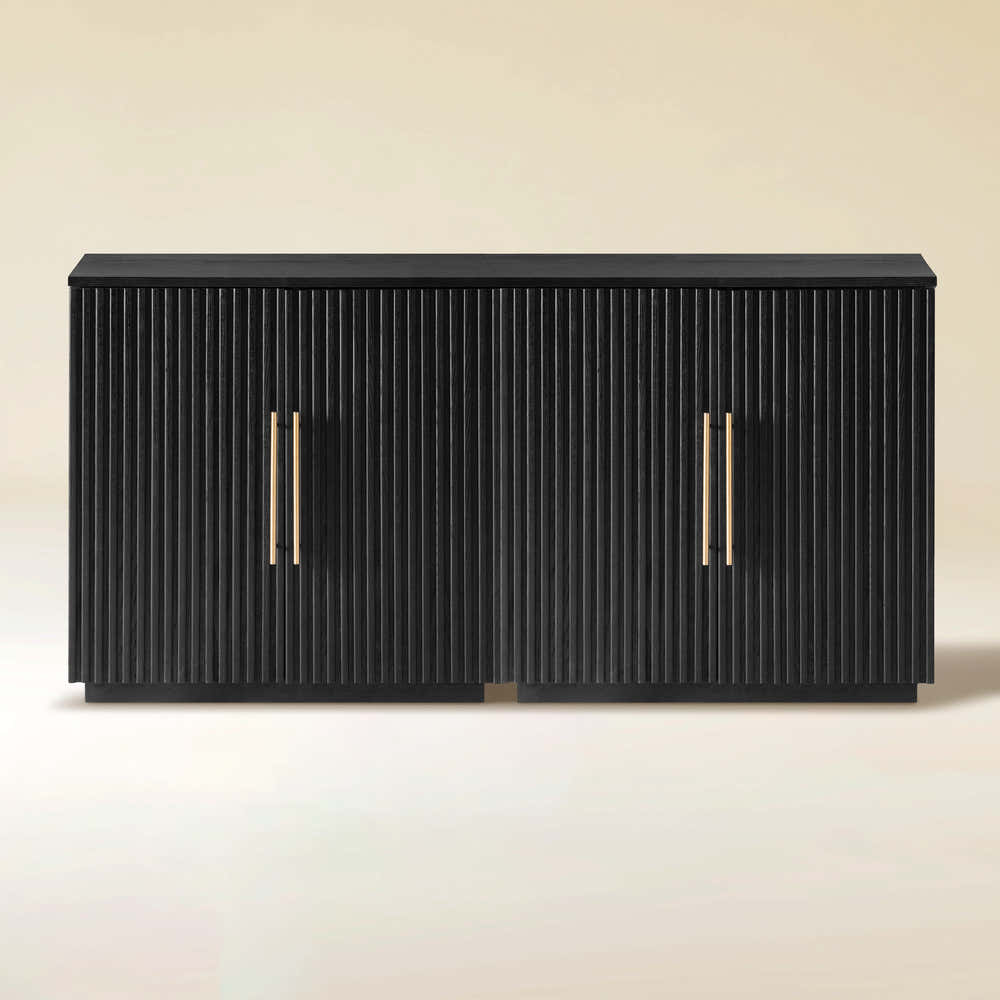
Alvar Arched 61" Oak Sideboard with Drawers(Set of 2)
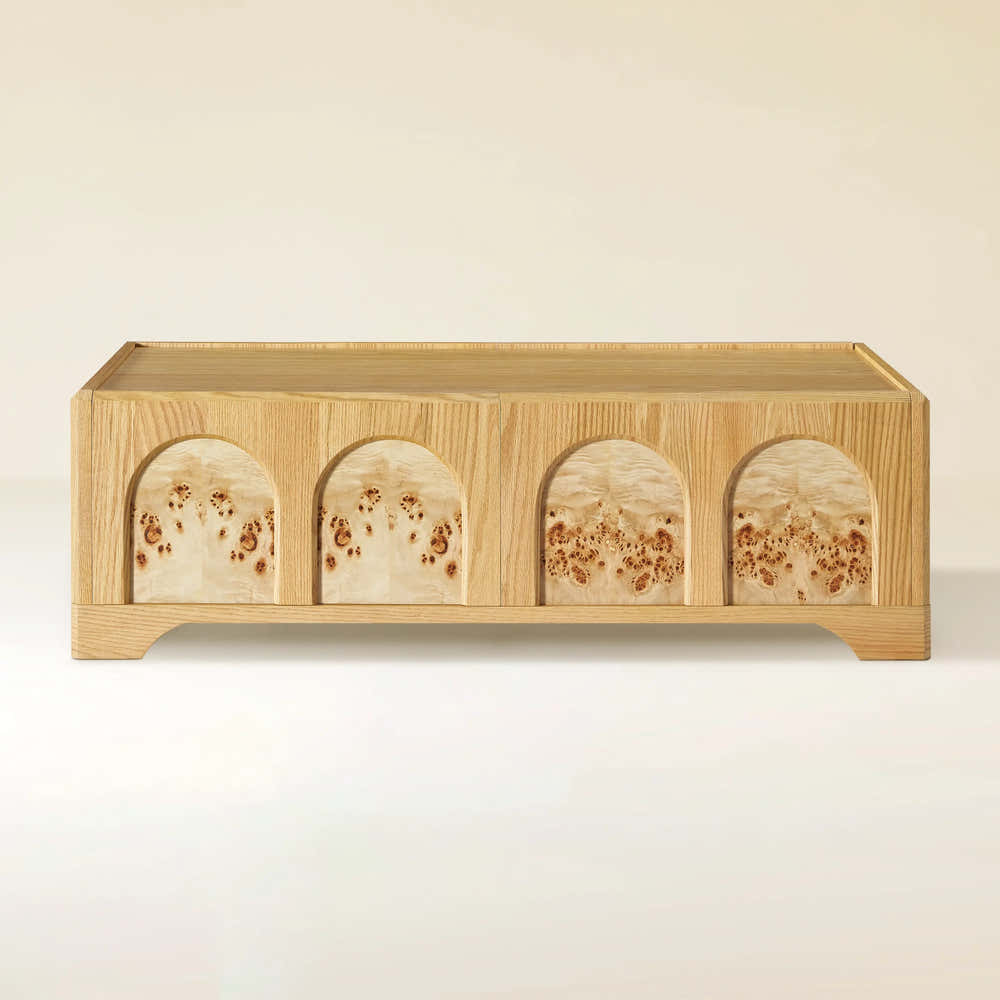
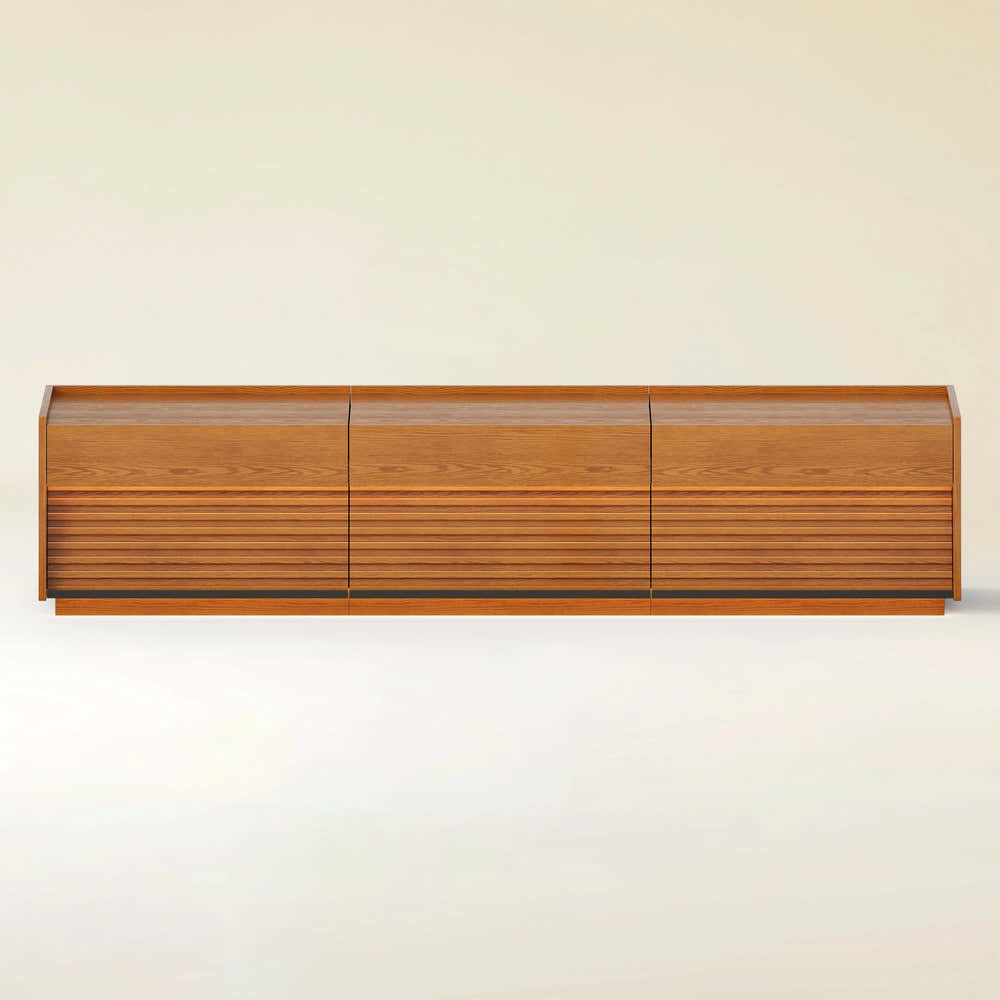
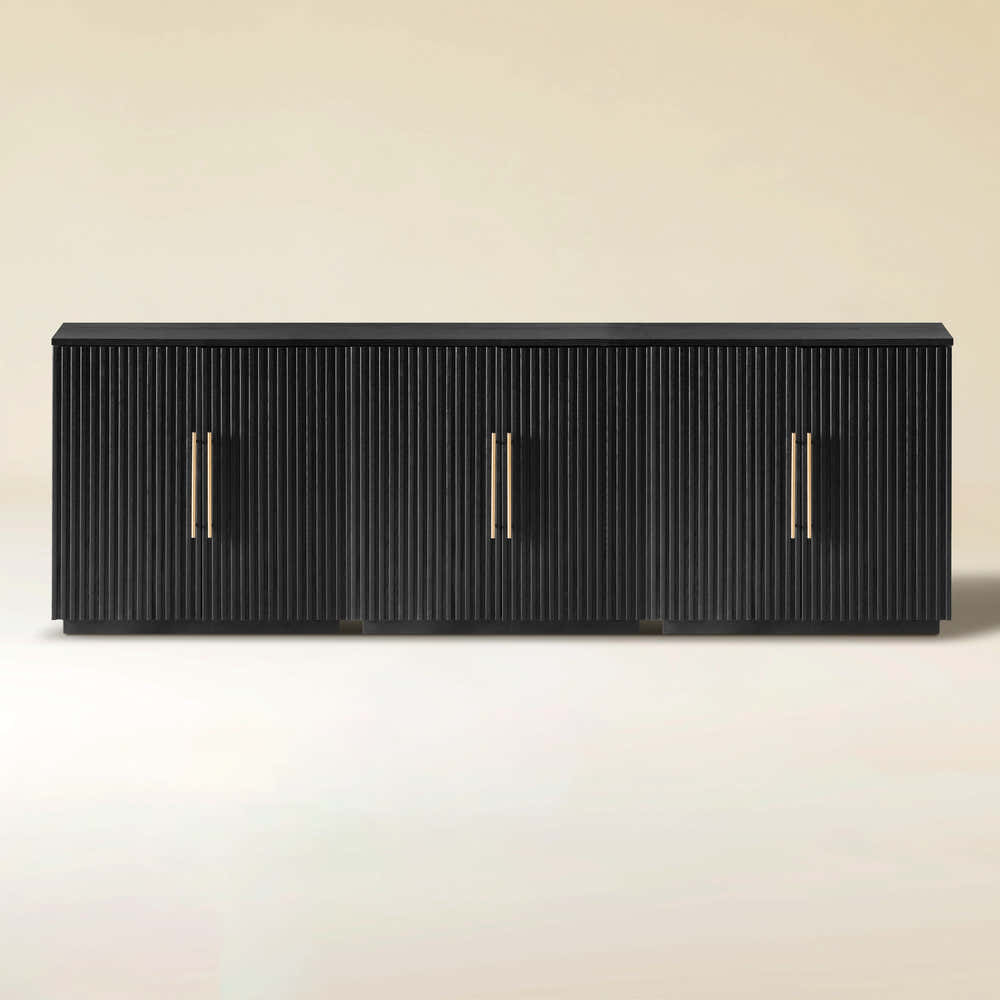
Alvar Arched 91″ Oak Modular Media Console(Set of 3)
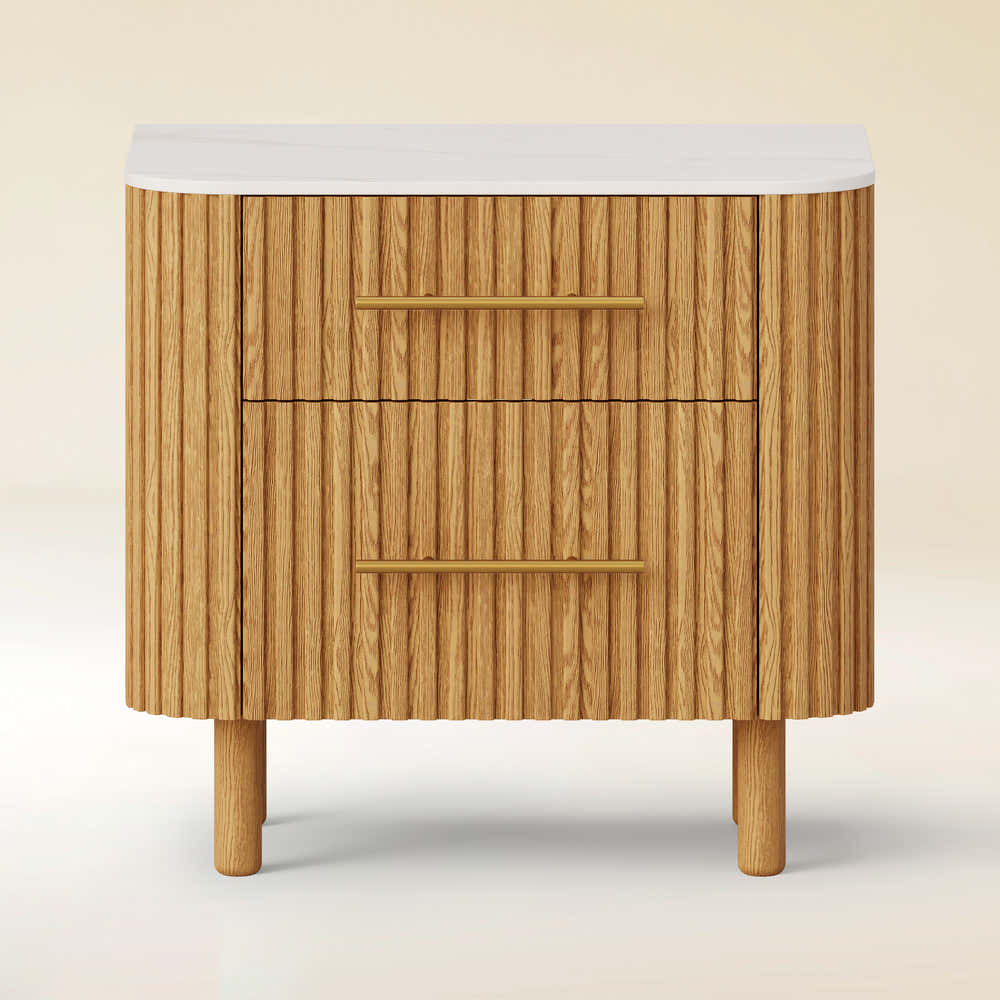
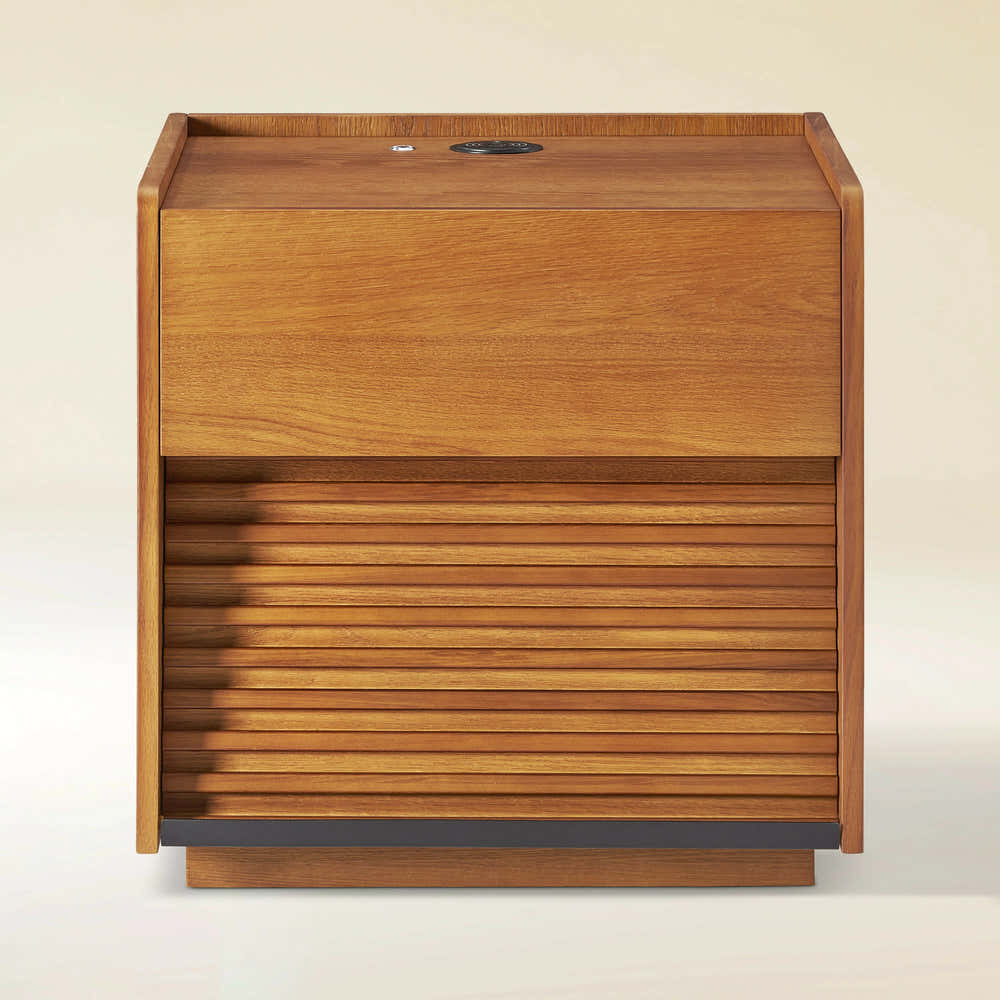
Charlie Sintered Stone Nightstand 26" W


Ethereal Crystal Radiance Round Chandelier 30"D


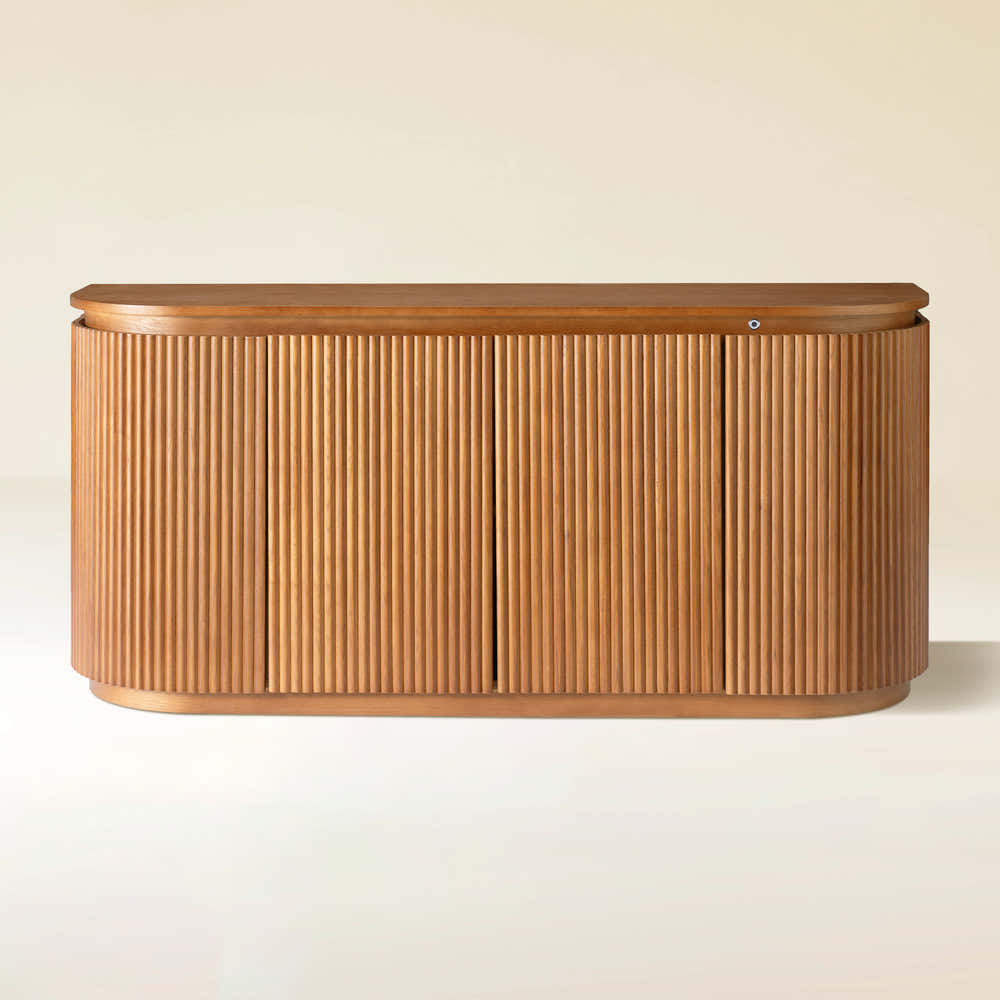
Ewan 63" Oak Slatted Sideboard Buffet Cabinet

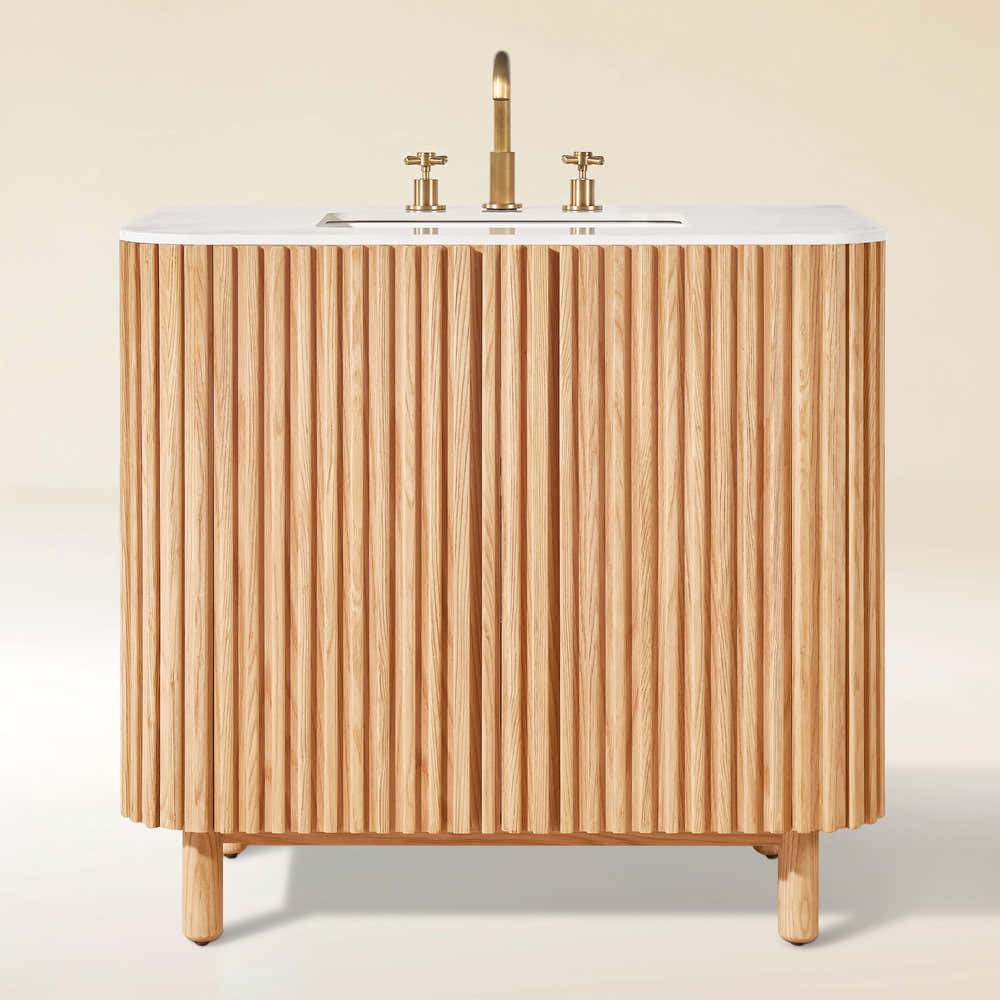
Ewan Sintered Stone Nightstand 26"W
Holt 63″ Solid Oak Console(Set of 2)
Holt 95″ Solid Oak Console(Set of 3)
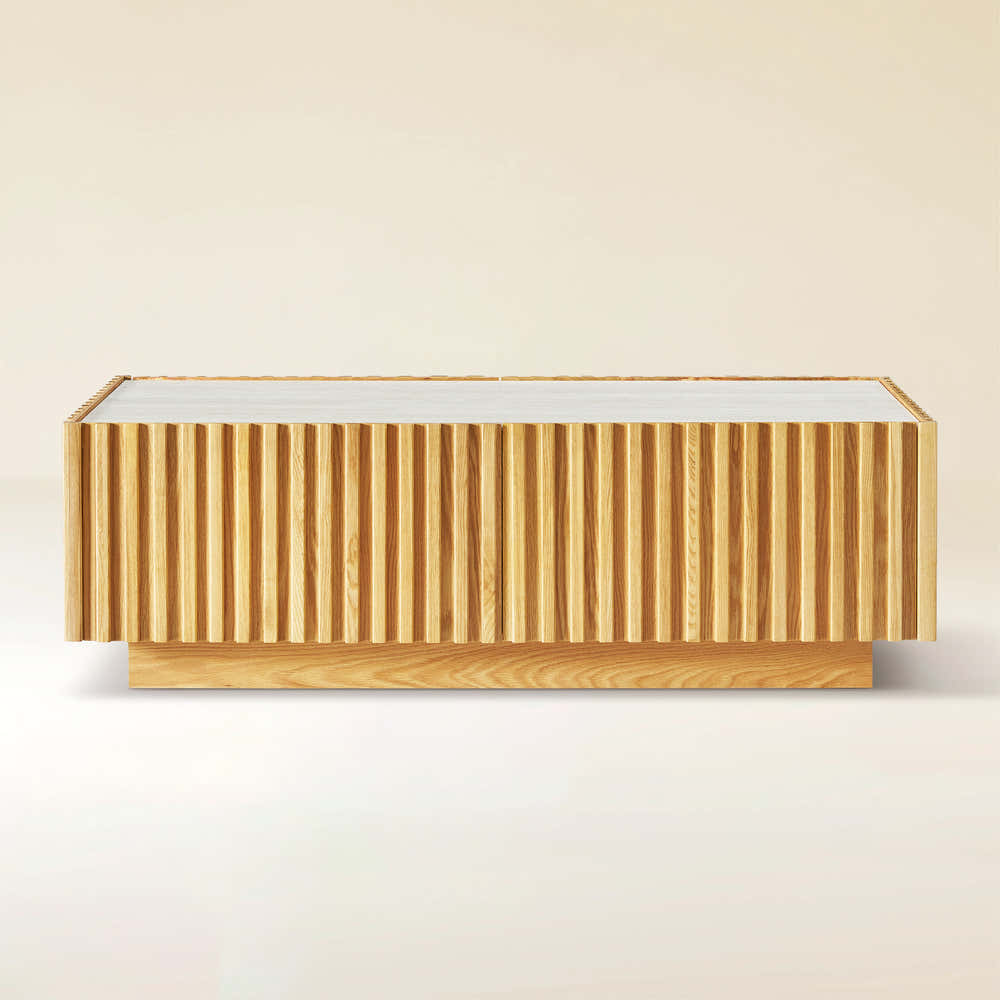
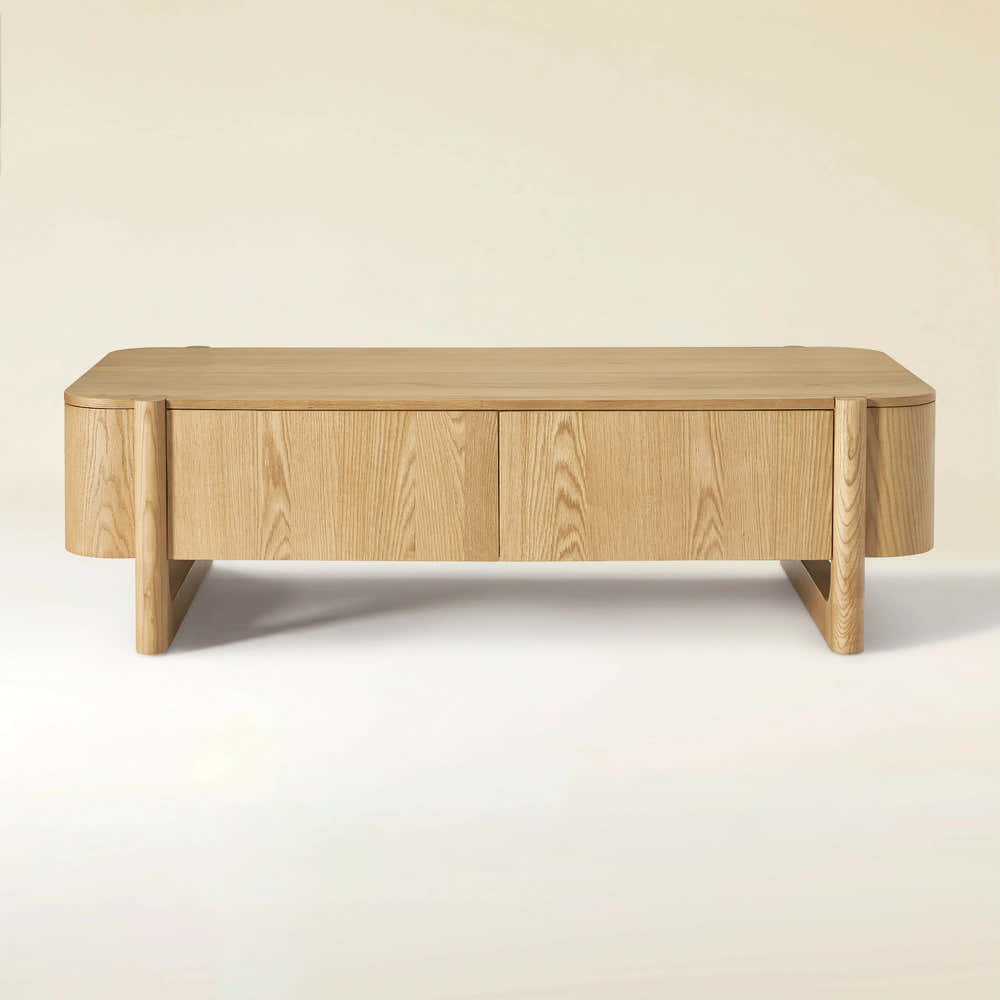
Isla Oak Sintered Stone Rectangle Coffee Table 120cm
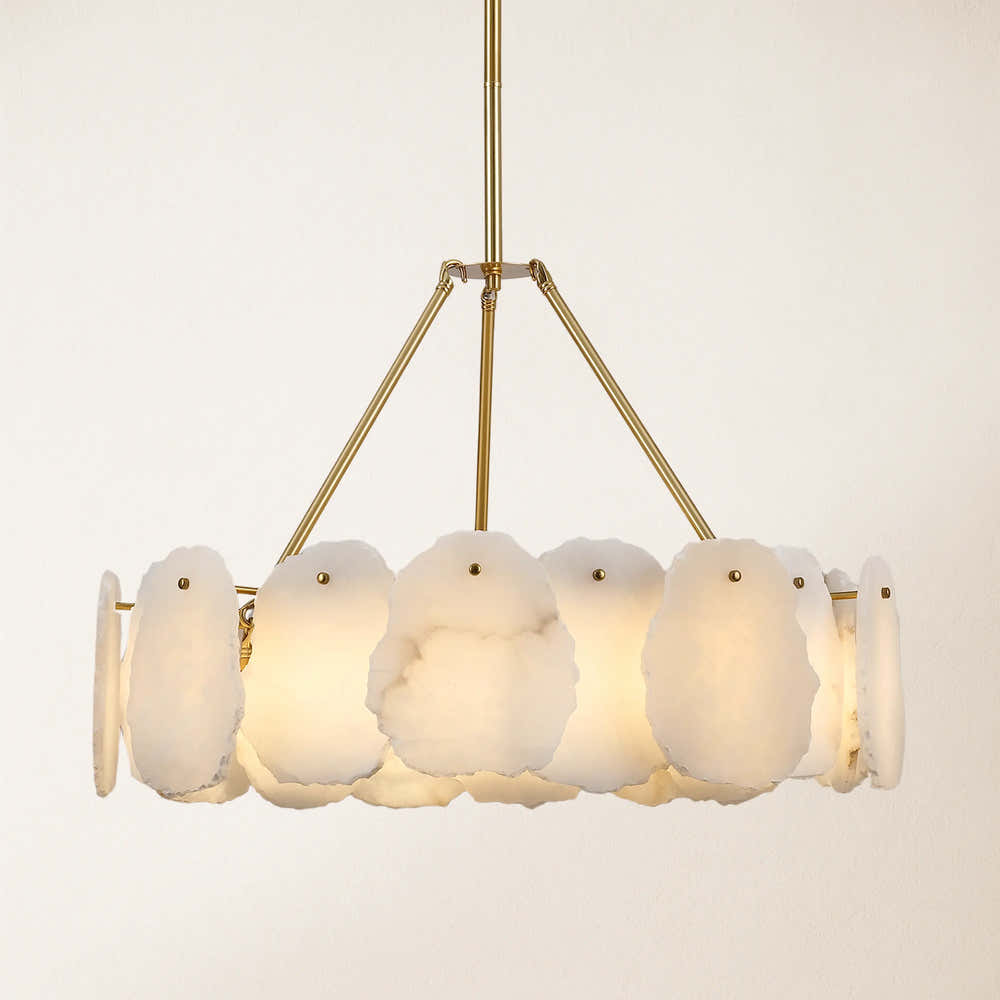
Moira Alabaster Round Chandelier 24"D
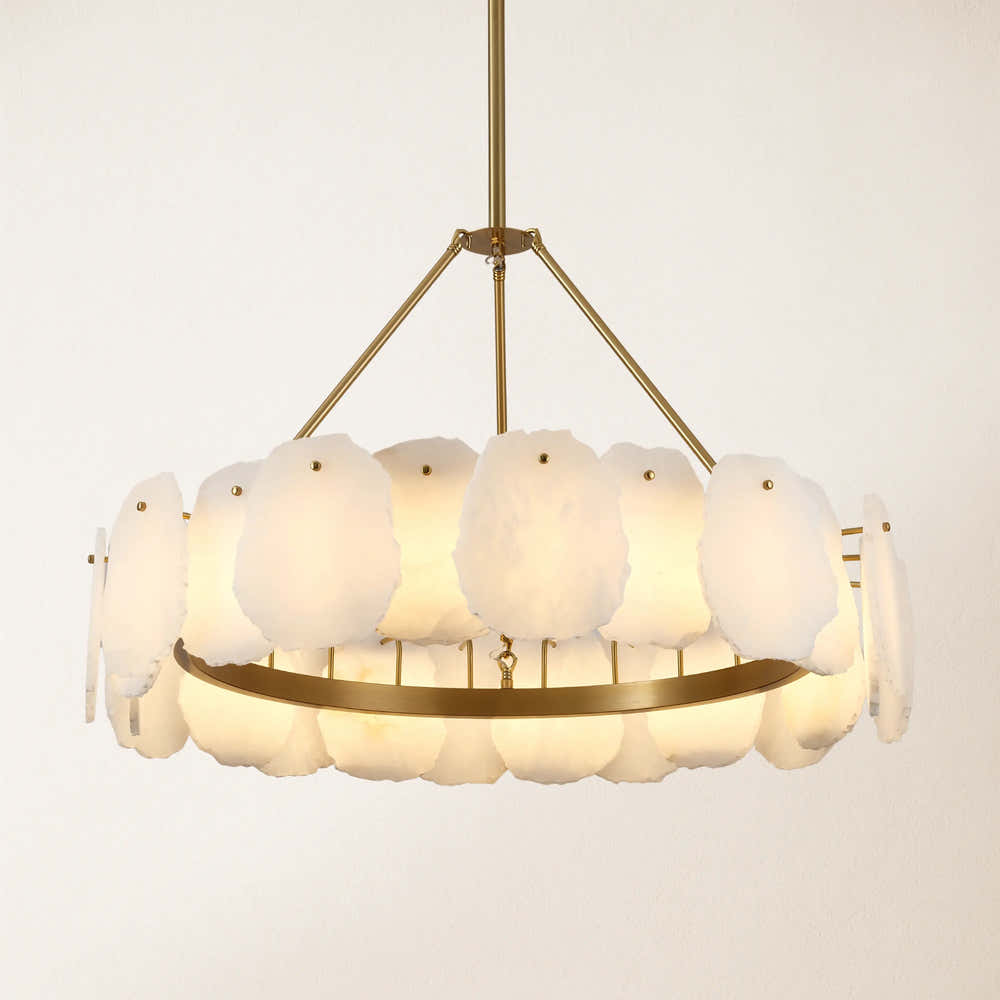
Moira Alabaster Round Chandelier 32"D
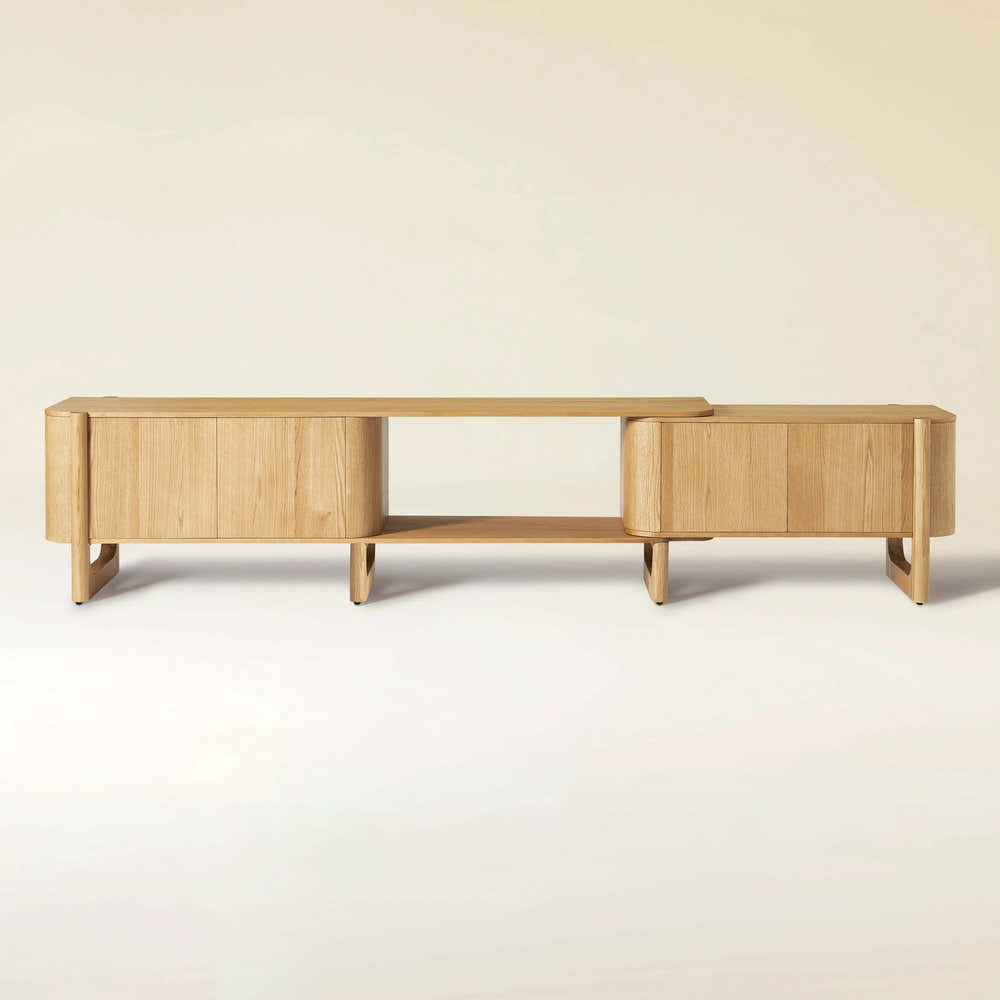
Silas Extendable TV Stand 203cm to 280cm

Stellara Crystal Strip Round Chandelier 24"D

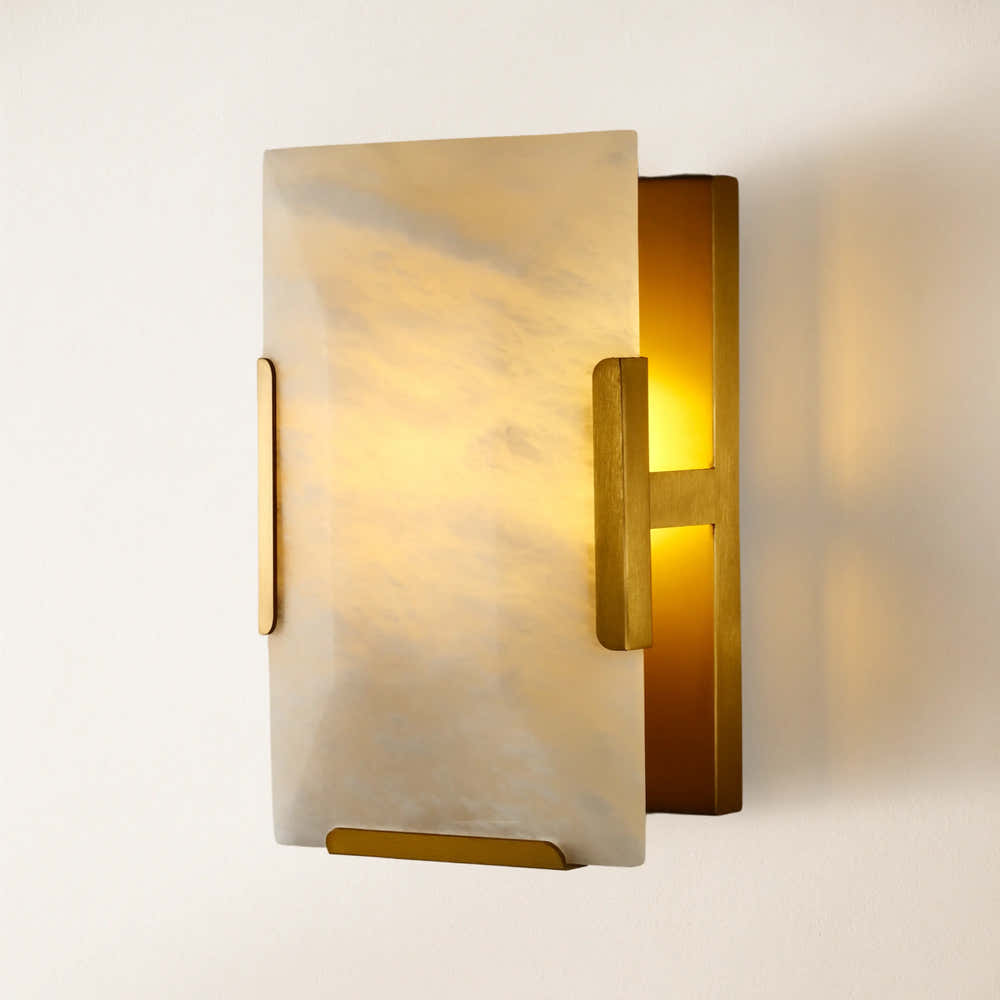
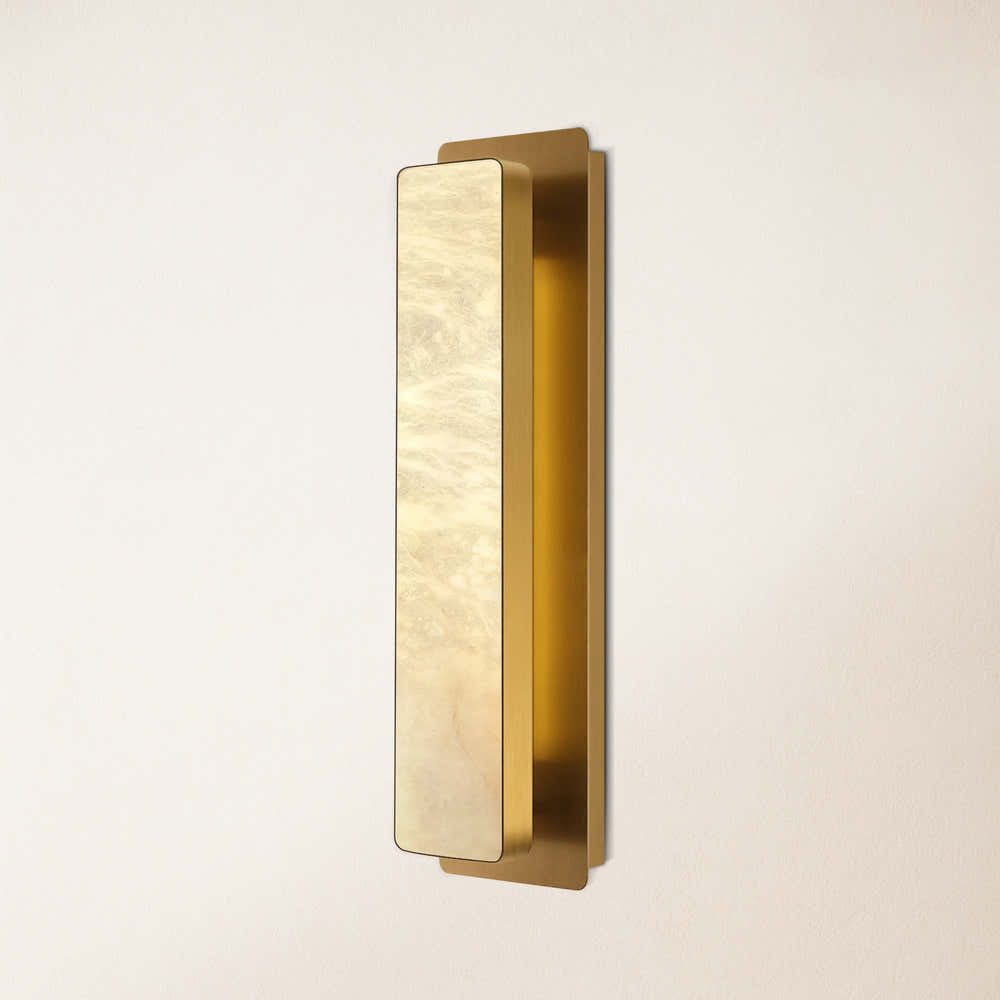
Sylvia Palladian Alabaster Wall Sconce 20"H
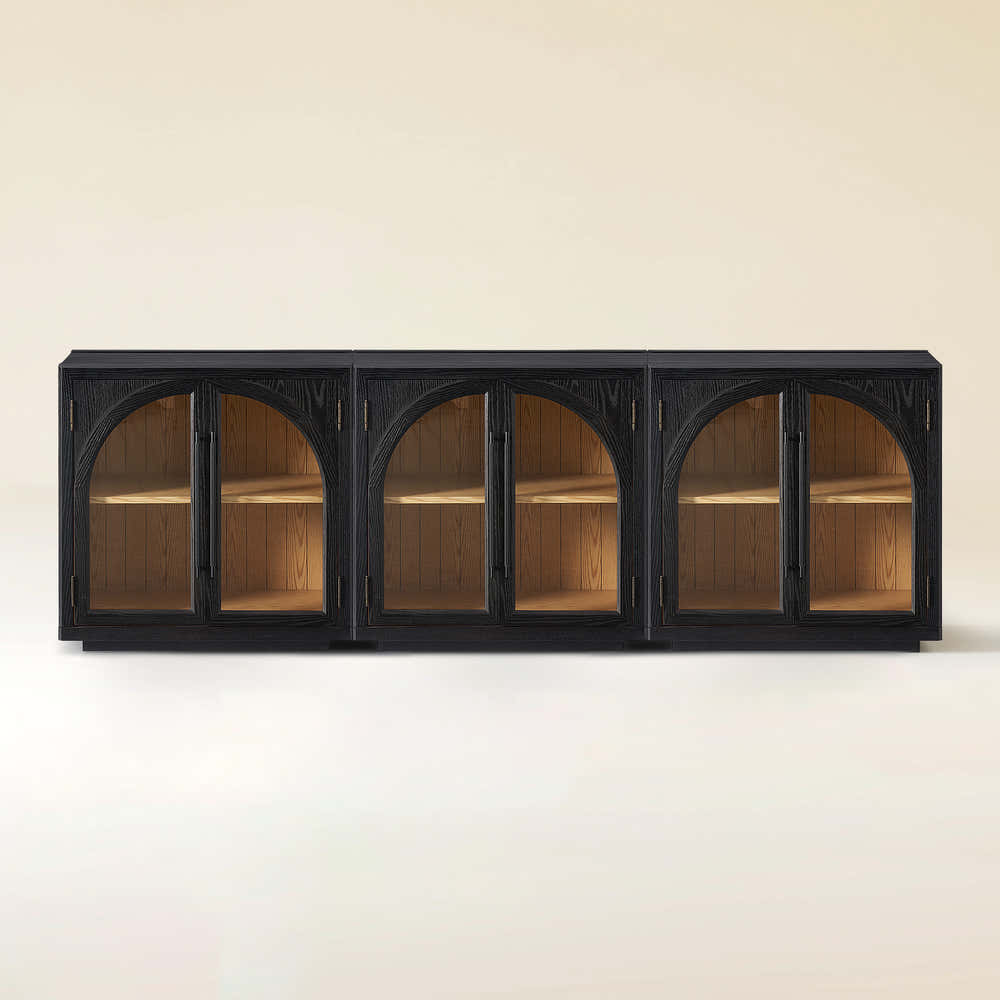
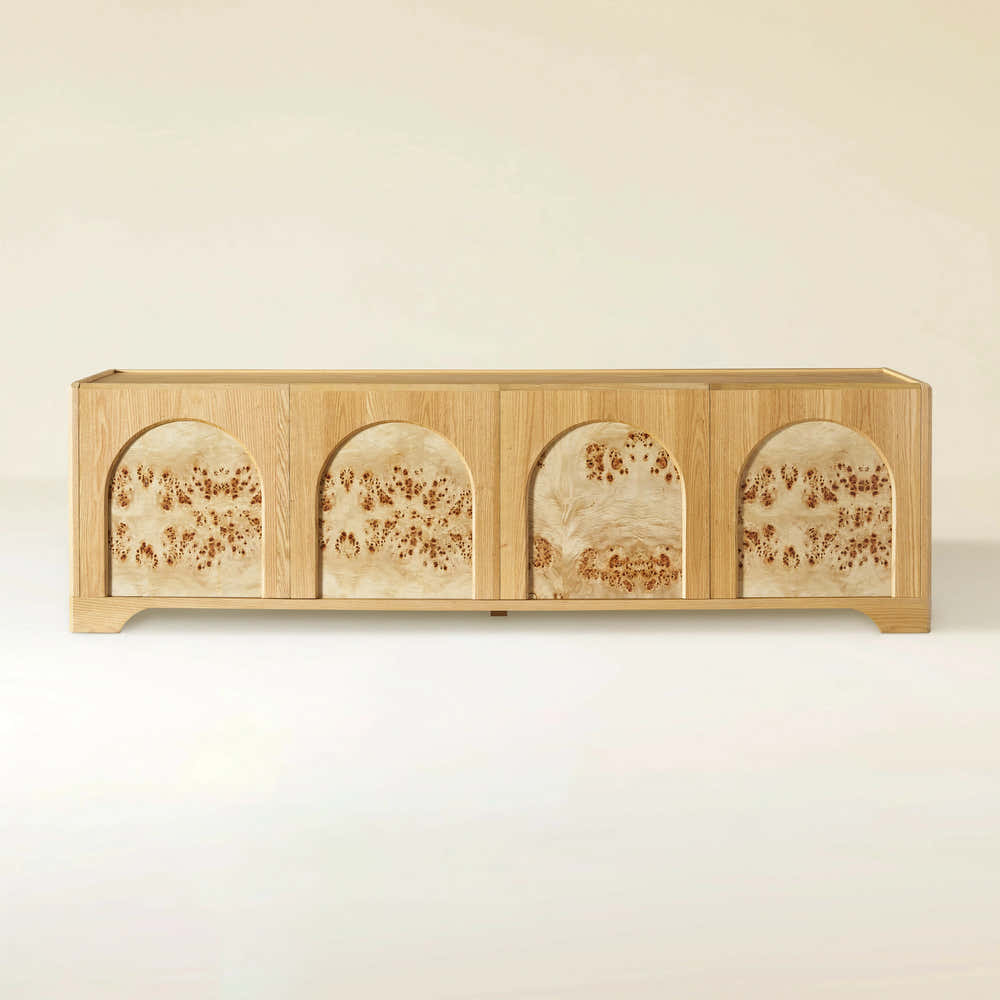
Alvar Arched 91″ Oak Media Console(Set of 3)

Ewan Oak Extendable Media Console 79" to 110"
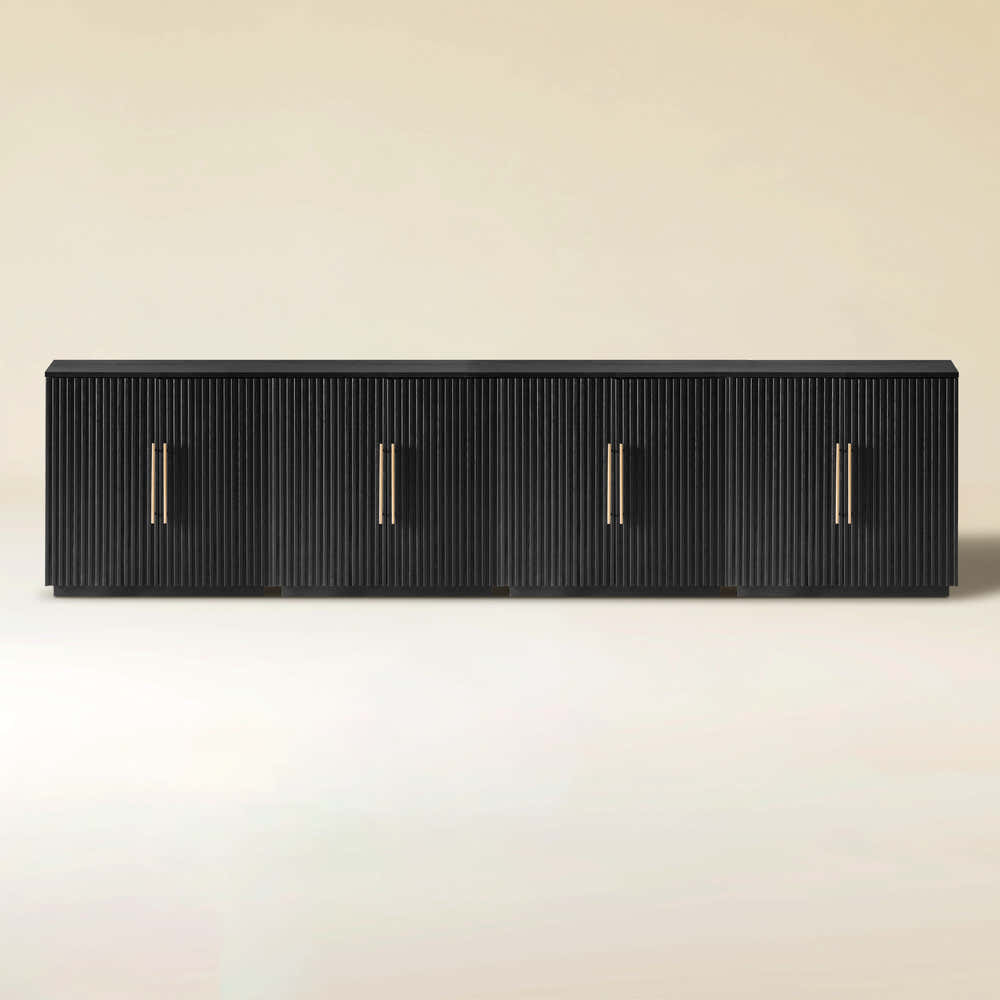
Holt 126″ Solid Oak Console(Set of 4)

FSC FCOC47059 . FSC is dedicated to the promotion of responsible forest management
worldwide. By selecting this product, you help take care of the woorld's forests

UL-certified for indoor drying environments not directly exposed to excessive moisture or water;
Use in the United States and Canada.

Certified to Dry ETL electrical standard: suitable for use indoors in dry locations not directly exposed to excessive moisture and water
Use in the United States

CE-certified drying equipment compliant with electrical standards: Suitable for indoor drying environments not directly exposed to excessive moisture or water;
Tested for use in Europe, the UK, and other regions.


The support center has answers to questions you may have. You can also contact customer service in the support center if you can't find what you're looking for.
Support Center >
At houlte, we are committed to delivering quality, style, and great value to our customers. Our goal is to simplify your shopping experience by providing competitive prices and exceptional service.

If an item you purchased from houlte goes on sale on our website within 30 days of your purchase date, you may request a price match. This policy ensures you always receive the best value when shopping with us.
Houlte reserves the right to interpret and adjust the terms of the Price Match Policy as necessary.
Houlte has partnered with Taskrabbit to make your everyday life at home easier by connecting you with flexible and affordable ways to get your to-do’s done including furniture assembly and mounting.

1. Purchase your furniture at Houlte.
2. Check your order Dispatched and Delivered email and click the
Houlte link. You will be redirected to Taskrabbit's landing page.
3. Post your task on Taskrabbit platform.
4. Pick the best tasker to assemble your furniture.
Houlte has partnered with Taskrabbit to make your everyday life at home easier by connecting you with flexible and affordable ways to get your to-do’s done including furniture assembly and mounting.
Taskrabbit Assembly is available in most metro areas in the US. The availability of Taskers varies based on demand. When placing an order on Taskrabbit, you will need to enter your zip code. If the service is not supported in your area, you will not be able to place an order.
You can book assembly for your Houlte furniture as early as the next day after your delivery, and up to 14 days in advance, giving you flexibility to choose a time that works best for you.

Ready to use out of the box; minimal installation may be required (e.g., handles).

Main structure is pre-built; minor components require attachment (e.g., legs).

Assembly required; multiple parts must be assembled before use.
Our furniture is built with a combination of core boards, real wood veneers, and selected solid wood parts. Each material is used for a different purpose—structure, surface appearance, or visible strength—so the final piece feels balanced in performance, finish, and cost.
Core boards form the internal foundation of the furniture. They provide structure, stability, and efficiency across large surfaces and cabinet bodies.

Stable structural board

Smooth and consistent

Functional internal board
Selected solid wood parts are used where visible strength, tactile quality, and structural integrity matter most—such as legs, frames, trim, and exposed support details.

Durable and classic

Light and versatile

Premium and elevated
Proper cabinet installation is key to a successful kitchen renovation. Professional contractors know that strong connections between units are crucial. Without secure mounting methods, even the most expensive units can fail over time.
This guide shares industry-proven strategies for kitchen cabinet assembly. You'll learn the tools professionals use and how to connect cabinets step by step. These methods ensure your installation meets structural requirements and keeps units perfectly aligned.

Whether you're starting your first DIY project or improving your skills, learning cabinet mounting techniques is vital. The strategies outlined here follow building codes and manufacturer specifications. Professional installers use these methods for both commercial and residential projects across the United States.
From planning to final adjustments, each technique builds on proven installation principles. These approaches ensure your units will stay securely connected for decades of use.
Before you start installing your cabinets, planning and measuring are key. Professionals spend a lot of time on planning. This step is crucial for a job well done.
There are three main parts to planning your cabinet installation. These parts help you create a solid plan. Each part tackles specific challenges that could mess up your project.
Getting accurate measurements is the first step in planning your cabinets. Measure your room's length, width, and height at different spots. This is because walls are not always straight.
Keep track of these measurements for your plan:
Make a detailed floor plan that shows where your cabinets will go. Include where appliances will be and how much space they need. This plan helps you spot problems before you start. Professional tip: Add a 1/8-inch gap between cabinets to account for wall irregularities.
The right order of installation is important. Start with upper cabinets to get to studs and wiring easily. Then, install base cabinets.
Here's a good order for installation:
Think about your workspace when deciding the order of cabinets. Big cabinets need more space. Plan when cabinets will arrive to match your installation order.
Checking your walls is crucial for a stable cabinet installation. Look for any unevenness or structural issues. Use a stud finder to mark all wall studs.
Check these important wall conditions:
Write down any problems that need fixing before you start. Uneven walls or electrical issues need to be fixed first. This avoids delays in your project.
Preparing your walls also means removing old fixtures and cleaning the surface. Use a laser level to mark your lines for even alignment.
Installing cabinets right needs the right tools and materials. The quality of your tools affects how well you work and how long your cabinets last. Getting the right tools first saves you from costly mistakes and keeps your cabinets secure for years.
For a successful cabinet project, you need three main things: power tools, quality hardware, and measuring tools. Each one is key to making your installation look and work like a pro.
A good cordless drill is the base of your cabinet installation kit. Look for one with at least 18 volts and variable speed control. It should be able to drill and drive, handling different tasks well.
Impact drivers are great for driving big screws into thick cabinet frames. They prevent the screw from coming loose or stripping, which is common with regular drills. Professional installers use impact drivers for strong results with dense hardwoods.
Pocket hole jigs make strong, hidden connections between cabinet frames. They drill angled holes for screws to pull the frames together tightly. The Kreg Pocket-Hole Jig is the top choice for this.
Right-angle drills are essential for tight spaces between cabinets and walls. Standard drills can't fit in these spots, making right-angle drills a must for complete jobs. Milwaukee and DeWalt make reliable right-angle drills for cabinet work.
The right fasteners depend on your cabinet's type and load needs. Different materials need different fasteners to avoid damage or failure over time.
Wood screws with coarse threads are best for solid wood and plywood cabinets. Choose screws that are at least 1.5 times the material's thickness. Stainless steel or zinc-coated screws resist corrosion in kitchens.
Machine bolts are the strongest for heavy-duty jobs. Use 1/4-inch diameter bolts with washers and nuts for big upper cabinets on wall studs. These spread the load better than screws alone.
Specialty fasteners like confirmat screws are designed for particle board and MDF. They have deep threads and big heads to prevent pull-through. Never use standard wood screws on particle board cabinets.
Accurate measurements are key to a successful cabinet project. A 25-foot tape measure with a standout blade is perfect for long cabinet runs. Look for one with clear markings and a sturdy case.
A 4-foot level ensures cabinets are perfectly plumb and level. Magnetic levels stick to metal frames, freeing your hands for adjustments. Digital levels offer precise readings for critical installations where bubble levels are not enough.
Stud finders help locate wall framing members for heavy cabinet loads. Electronic models detect wood and metal studs through drywall and plaster. Always check stud locations by drilling small pilot holes before installing hardware.
| Tool Category | Essential Items | Professional Upgrade | Typical Cost Range |
|---|---|---|---|
| Power Tools | Cordless drill, impact driver | Right-angle drill, pocket hole jig | $200-$600 |
| Measuring | Tape measure, 4-foot level | Laser level, digital angle finder | $50-$300 |
| Safety | Safety glasses, work gloves | Knee pads, dust mask, hearing protection | $30-$100 |
| Hardware | Wood screws, wall anchors | Confirmat screws, machine bolts | $25-$150 |
Safety gear is crucial for protecting installers during cabinet work. Safety glasses prevent eye injuries from debris. Work gloves improve grip and protect hands from sharp edges and splinters.
Knee pads reduce fatigue and prevent injury when installing base cabinets. Quality pads with gel cushioning make work comfortable for long periods. Hearing protection is needed when using power tools in tight spaces for a long time.
A good first aid kit is essential for minor cuts and scrapes that happen during installation. Include bandages, antiseptic wipes, and pain relievers for quick treatment of minor injuries. Professional installers never skimp on safety equipment to save money.
Before starting any cabinet fastening project, it's key to have a safe and organized workspace. Installation safety and proper workspace preparation help avoid mistakes and injuries. Professional contractors know that good preparation leads to better results.
A clean workspace helps avoid delays and makes it easier to align cabinets correctly. Having clear paths, enough light, and tools in order makes the job smoother. These steps are crucial for professional-quality work.
First, clear the area of furniture, appliances, and debris. This makes room for the cabinets. Remove old cabinets carefully to avoid damage.
Use drop cloths or cardboard to protect surfaces from scratches and dents. This step is important for safety.
Make sure the area is well-lit. Use portable lights if needed. Good lighting prevents mistakes and keeps the work area safe.
Organize tools and hardware in easy-to-reach spots. Keep fasteners, measuring tools, and power equipment in separate areas. This saves time and avoids mistakes.
"Proper preparation prevents poor performance. A well-organized workspace is the hallmark of professional cabinet installation."
Do a detailed cabinet inspection before starting. Look for damage, missing parts, and check the hardware. This step is crucial for quality.
Make sure all hardware is there and matches your plan. Count screws and other parts to avoid missing items. Missing parts can cause big delays.
Test doors, drawers, and shelves before installing. Fix any issues now to avoid problems later. Cabinet inspection at this stage helps prevent future repairs.
Use a laser level to mark walls for cabinet placement. Start with the highest floor point for height measurements. This ensures cabinets are aligned right.
Find and mark wall studs with a stud finder. Then, drill small holes to check. Mark stud centers clearly for secure mounting.
Draw cabinet layout lines on walls with chalk or pencil. Show where each cabinet goes, including corners. This helps avoid mistakes and speeds up the job.
Turning cabinet fastening into action involves a series of steps. Each step is crucial for a secure and aligned cabinet installation. Following a proven sequence and technique is key to achieving professional results.
The first cabinet's installation sets the stage for the rest. It must be perfectly level before adding more units.
Place the first cabinet against the wall at your marked line. Use a 4-foot level to check its levelness. Adjust it with shims until it's perfectly level.
Secure it to wall studs with 3-inch wood screws. Make sure to screw into at least two studs for stability. Double-check the levelness after securing.
Aligning each cabinet is crucial. Place the next cabinet close to the first one, leaving a 1/8-inch gap for adjustments.
Use a straightedge to check alignment. The tops and faces should line up perfectly. Make small adjustments as needed.
Keep cabinet doors and drawers evenly spaced. Use spacer blocks for uniform spacing.
Creating strong cabinet connections is essential. Use a combination of connector bolts and face frame screws for stability.
This method prevents movement and ensures long-term stability. It's a key part of professional cabinet installation.
Drill pilot holes carefully to avoid splitting the wood. Mark the connection points on both cabinets.
Drill holes slightly smaller than the bolt size. Drill through one cabinet and into the next. Make sure the hole is deep enough for the bolt.
Insert the bolts through the holes. Tighten them slowly while checking alignment. This prevents over-tightening.
Clamps help keep cabinets aligned during installation. Place them across the faces to pull them together.
Apply gentle pressure to avoid damaging the wood. Use blocks to protect the surfaces from clamps.
Install face frame screws while the cabinets are clamped. Remove the clamps after tightening all fasteners.
Perfect alignment is crucial before making permanent connections. Rushing can lead to gaps and unstable cabinets that need expensive fixes.
Test each connection by gently pushing and pulling. Properly fastened cabinets should feel solid. Any movement means you need more fasteners.
Installing wall cabinets is a challenge that needs careful planning and the right support systems. Unlike base cabinets, which sit on the floor, upper cabinets rely on wall attachment for support. Their weight, along with what's inside, puts a lot of stress on the mounting hardware and the wall.
For professional installation, it's important to understand how loads are distributed and what the structure can handle. Each cabinet must be securely attached to wall studs and aligned with others. Safety is crucial when working at heights with heavy cabinets.
Finding the right spot for wall studs is key to mounting upper cabinets securely. Electronic stud finders are the best tool for this job. They detect changes in wall density to pinpoint stud locations accurately.
Other methods, like tapping the wall with a hammer, can also help find studs. Small finish nails can be used to probe suspected stud locations before drilling pilot holes.
Studs are usually 16 or 24 inches apart in homes. Measuring from corners or outlets can help guess where studs are. Always double-check stud placement at different points to ensure support is even.
Support systems are vital for safe and accurate installation. Cabinet jacks adjust to different heights and hold the cabinet's weight while installers secure it with permanent fasteners. These tools make the job easier and reduce fatigue.
Another option is using temporary ledger boards. A level 2x4 board, fastened to wall studs, acts as a shelf for the cabinets. This method is great for installing multiple cabinets at once.
The support system must fit the cabinet's size and weight. Wall cabinets can weigh 40-80 pounds empty, plus more for doors, shelves, and hardware. Proper support prevents damage to the cabinets and keeps installers safe.
Connecting upper cabinets requires careful planning of wall attachment and cabinet-to-cabinet fastening. Screws must go into wall studs at least 2.5 inches deep for strong holding. Cabinet-to-cabinet connections use special bolts to keep units aligned.
The order in which you install cabinets affects how well they connect. Start with corner units and work outward for easier alignment. Each cabinet must line up perfectly with others before securing.
The type of mounting hardware used affects how stable the cabinets will be. Heavy-duty screws with washer heads spread the load evenly across the cabinet frames. Quality fasteners prevent sagging and keep doors aligned over time.
Evenly distributing weight across mounting points prevents stress on individual fasteners. Each upper cabinet needs at least two mounting points into wall studs. Cabinets wider than 24 inches require more points for proper support.
The contents of the cabinets add a lot of weight to the mounted assembly. Dishes, glassware, and food can double the load on the mounting hardware. Planning for the maximum expected load ensures stability over time.
Calculating loads helps determine the right spacing and number of fasteners. Standard wall cabinets support 20-30 pounds per linear foot of shelf space. Conservative estimates provide a safety margin for different usage patterns.
Keeping the same distance between upper cabinets makes the installation look professional. The gap between cabinet faces should be 1/8 inch to 1/4 inch. Measuring carefully and adjusting as needed is necessary for uniform gaps.
Checking alignment at multiple points during installation is crucial. Door faces, cabinet tops, and edges must align across all units. Laser levels help keep the cabinets straight.
Final adjustments account for minor wall irregularities and cabinet variations. Shims behind the mounting points correct for wall imperfections. Patient adjustment work is what sets professional installations apart from amateur ones.
Each cabinet material needs its own fastening method for the best results. Knowing the unique traits of cabinet construction types helps pick the right hardware and techniques. This knowledge helps avoid common problems and ensures strong connections last long.
The type of material affects how well it holds fasteners and changes with the environment. Different woods expand and contract at different rates. Engineered materials have special load-bearing properties that affect fastening choices.

Solid wood cabinets hold screws well and are durable. They can handle heavy loads when fastened right. But, they need careful handling to avoid splitting and cracking.
Always drill pilot holes before screwing into solid wood. The hole should be a bit smaller than the screw. This helps prevent the wood from splitting and ensures a tight fit.
Plywood cabinets are strong in all directions. Their layered construction spreads stress evenly. Use wood screws with coarse threads for the best hold in plywood.
Particle board and MDF need special fastening methods compared to solid wood. These materials can strip if screws are too tight. The compressed fibers break down under too much pressure.
Use specialized fasteners for engineered wood products. Confirmat screws work well for particle board connections. These screws have deep threads that grip the material well.
Avoid driving screws too close to edges in particle board. The material tends to crumble near edges under stress. Leave at least one inch from any edge when placing fasteners.
Frameless cabinets don't have the traditional face frame. This European-style needs different connection methods. The cabinet sides become the main connection points.
Connect frameless cabinets through their side panels using specialized hardware. System 32 holes provide precise mounting locations. These pre-drilled holes ensure accurate alignment and strong connections.
Use cam locks and bolts for removable connections in frameless systems. These hardware pieces create strong joints that can be disassembled if needed. The connections remain hidden inside the cabinet structure.
Mastering advanced installation techniques is key for complex kitchen designs. These projects need precise measurements, specialized hardware, and expert skills. It's about understanding how different cabinets work together and keeping the structure strong.
Installers must adapt to each layout's unique challenges. Each project has its own obstacles that need creative solutions and technical know-how. Here are some common advanced techniques used in modern kitchens.
Corner cabinet installation needs careful planning for door clearances and smooth operation. The main challenge is aligning the corner unit with other cabinets while keeping everything level. Most corner cabinets use special hinges for smooth door opening.
Begin with the corner cabinet as a reference for other units. Use a framing square to ensure it's square at both corners. Precise positioning here prevents later alignment issues.
When installing a lazy Susan, test its rotation before final placement. It should rotate smoothly without catching on cabinet walls. Adjust its height for proper clearance.
Secure corner cabinets with heavy-duty screws into wall studs. The L-shape adds stress points needing reinforcement. Use cabinet connecting bolts for a strong connection between units.
Kitchen island installation is tricky since they lack wall support. Start by marking the floor for the island's exact spot. Use chalk lines to outline the cabinet's footprint, ensuring enough space for traffic and appliance doors.
Attachment methods vary by flooring and subfloor. Concrete floors use anchors or adhesive, while wood subfloors require screws into joists. This ensures maximum stability.
Peninsula cabinets combine island and wall attachment methods. The wall end mounts like standard cabinets, while the free-standing part anchors to the floor. This dual attachment system adds stability.
Electrical work in island installations needs careful planning. Plan wire routing before final placement to avoid conflicts. Islands often need dedicated circuits for outlets, lighting, or appliances.
Multi-height cabinets add visual interest and storage. They require careful planning to maintain structural integrity. The installation sequence is crucial for different heights and depths.
Start with the tallest cabinets as references for the whole installation. These units guide the positioning of shorter cabinets. Use a laser level to project reference lines across the area.
Transitions between heights need special attention for a professional look. The connection points must be structurally sound and visually seamless. Professional installers use custom techniques to hide height differences.
Smooth transitions between heights require careful planning and execution. The goal is to maintain visual continuity and structural integrity. This often involves custom modifications and trim work.
Use stepped installation for height transitions. Install taller cabinets first, then position shorter ones to align with reference points. The hardware must accommodate the height difference securely.
Crown molding and trim pieces help hide gaps and create a finished look. These elements enhance the installation's quality. Professional installers often make custom trim for perfect fits.
Filler strips cover gaps and adjust dimensions in complex installations. They help fit cabinets to irregular walls. Proper installation requires precise measurements and careful cutting.
Match filler strip materials and finishes to the cabinets for seamless integration. Most manufacturers offer matching strips, but custom pieces may be needed. Sand and finish them to match the cabinets exactly.
Trim pieces complete the look of complex cabinet installations. They include crown molding, base trim, and decorative accents. Install them after all cabinets are secured and aligned for perfect fits.
| Installation Component | Primary Challenge | Key Technique | Critical Measurement |
|---|---|---|---|
| Corner Cabinets | Door clearance alignment | Square positioning first | Diagonal measurements |
| Kitchen Islands | Floor attachment stability | Multiple anchor points | Traffic flow clearances |
| Multi-Height Configs | Level reference maintenance | Tallest units first | Laser level projections |
| Cabinet Transitions | Visual continuity | Custom trim fabrication | Gap tolerances |
Advanced installation techniques require patience and detail. They ensure durable and visually appealing results that meet high standards. Mastering these techniques opens up opportunities for challenging cabinet projects.
Even expertly installed cabinets can face issues like alignment problems, gaps, or loose connections. These problems need specific solutions. Knowing the causes helps fix them quickly without redoing the whole installation.
Most problems come from three main sources. Wall irregularities can mess up your installation. Cabinet manufacturing tolerances can cause slight differences. And, installation errors can add up.
Professional installers use a systematic approach to save time and materials. First, check if the problem is with one cabinet or many. Look at your original measurements and reference lines. This helps you figure out if you need small tweaks or bigger changes.
Door alignment problems often mean the cabinet is not placed right. If doors don't close properly or show uneven gaps, the cabinet needs adjusting. First, make sure it's level and plumb against the wall.
To fix, loosen the screws holding the cabinet to the wall a bit. Then, use shims to correct any wall bow or twist. Small adjustments of 1/16 inch can make a big difference in door alignment.
For drawer alignment, ensure the cabinet box is square. Measure diagonally inside the cabinet opening. If the measurements are equal, the cabinet is square. Adjust its position until they match.
European-style hinges offer three-way adjustment. Use the depth adjustment to make doors flush with the cabinet face. Adjust the height to fix doors that are too high or low. Side-to-side adjustment closes gaps between doors.
Gaps in cabinets often come from wall issues not fixed during installation. Measure the gap at different points to see if it's the same everywhere. If it's consistent, the whole cabinet needs moving.
If the gap varies, the wall might be uneven. Use a straight edge to find high and low spots. If needed, remove the cabinet to add blocking or furring strips for a flat surface.
For gaps between cabinets, check if they're at the same depth from the wall. If not, adjust the rear cabinet until they align perfectly.
Scribe molding is a good fix for small gaps between cabinets and walls. It covers up to 3/4 inch of irregularities while looking professional. Install it after making all cabinet adjustments.
Loose cabinet connections can make the whole installation unstable. Test each connection by gently pushing and pulling on the cabinet faces. Any movement means the fastening or hardware is not strong enough.
Cabinet-to-cabinet connections need screws in the right spots. Replace stripped screws with bigger ones or use threaded inserts for damaged holes. Never rely on adhesive for structural connections.
Wall-to-cabinet connections must hit solid framing members. If screws miss the studs, move them to solid wood. Use toggle bolts only as a last resort, and never for upper cabinets.
Heavy cabinets might need extra support brackets underneath. Install these brackets into wall studs to support the cabinet's weight without blocking door operation. Metal brackets are stronger than wooden cleats.
After making adjustments, check that all connections are tight. Retighten any screws that may have come loose. This ensures your fixes will last under normal use.
Expert cabinet installers use proven methods and top materials for lasting installations. These professional installation tips help avoid common mistakes and keep structures strong over time. Knowing how to pick the right fasteners, distribute loads, and finish quality is key.

Choosing the right fasteners is crucial for both immediate and long-term needs. Cabinet screws must fit the materials and connections being joined. Different materials need different fasteners for the best hold.
For face frame cabinets, use 2½-inch wood screws at stile locations. This gives strong hold without weakening the structure. Frameless cabinets need cabinet bolts or confirmat screws for the sides.
Wall-mounted cabinets require 3-inch lag screws or structural screws into studs. Never just use drywall anchors for upper cabinets. Fastener size should be at least ¼-inch for strong connections.
| Cabinet Type | Recommended Fastener | Size Specification | Installation Location |
|---|---|---|---|
| Face Frame Base | Wood Screws | 2½ inch #8 | Through face frame stiles |
| Frameless Base | Confirmat Screws | 7mm x 50mm | Cabinet side panels |
| Upper Wall Mount | Lag Screws | ¼ inch x 3 inch | Into wall studs |
| Cabinet-to-Cabinet | Machine Bolts | ¼ inch x 2½ inch | Through cabinet sides |
Keeping cabinets stable over time means understanding wood movement and load distribution. Proper support prevents sagging at joints and mounting points. Reinforce stress points to keep cabinets aligned for years.
Install support blocks behind cabinet backs where they meet. These blocks spread loads evenly and prevent joint failure. Use solid wood blocks for the strongest support.
For upper cabinets, use a continuous mounting rail along the wall before hanging. This rail spreads weight across studs and supports cabinets better. It also makes installation easier and more stable.
Professional installations focus on details that affect both looks and function. Consistent gaps between doors and drawers make for a high-quality look. Proper alignment ensures smooth operation over time.
Use shims for perfect alignment instead of forcing cabinets. Forcing them can cause future problems. Take time to align correctly during installation.
Fill screw holes with matching wood filler or plugs. Sand and finish to match the area. This attention to detail makes professional work stand out and justifies higher prices.
Test doors and drawers for smooth operation before finishing. Adjust hinges and slides as needed. Professional installations work flawlessly from the start and stay that way for years.
Quality control turns a basic cabinet job into a top-notch project. It makes sure every part works right and meets high standards. Experts know that checking everything carefully stops problems before they start.
Making final adjustments needs patience and careful eye for detail. Even small tweaks can make a big difference in how your cabinets look and work. Spending time on quality control saves a lot of trouble later.
A detailed cabinet inspection starts with checking all the connections between units. Make sure screws are tight and flush with the surface. Loose screws can make cabinets unstable and doors sag.
Look at how the cabinet faces line up to make sure they're even. Use a straight edge to find any uneven spots. Adjusting screws a bit can fix most alignment problems.
Check the inside of cabinets for proper fit and function. Shelves should be level and drawers should slide smoothly. This ensures everything works right.
Adjusting door alignment involves tweaking hinges for even gaps and smooth opening. Start by checking the space between doors, aiming for about 1/8 inch. Make small adjustments to screws to avoid mistakes.
Make sure doors close fully and latch without too much effort. Soft-close features should work smoothly. Replace any broken or faulty parts found during this step.
For drawers, focus on even gaps and smooth movement. Adjust slides to prevent binding and support the weight of drawers. Test drawers with normal loads to ensure they can handle it.
Testing cabinet stability means applying gentle pressure to see if it moves. A well-built cabinet should feel solid and not move. Fix any issues found right away.
Check how all moving parts, like doors and drawers, work. They should move smoothly without any noise or resistance. Note any problems that need fixing before finishing the job.
Quality control ends with cleaning and polishing. Remove all debris and make sure everything looks new again. A clean, polished installation shows off professional work.
Getting cabinet installation right takes the right techniques and attention to detail. This guide has covered all the key steps, from planning to the final check. It helps both pros and DIYers make lasting installations.
Professional results mean more than just putting pieces together. Each connection must be strong, level, and right. The guide shows that success begins with good prep and follows with careful execution.
Quality installations need patience and precision. Hurrying can ruin the whole project. The methods in this guide keep your cabinets stable, useful, and looking great for years.
Every cabinet job has its own challenges. Walls, cabinets, and layouts differ. But the basics stay the same: measure twice, cut once, and secure well.
Investing in these techniques boosts customer happiness and project longevity. Whether it's your first or hundredth cabinet job, these methods ensure top-notch results. They make any kitchen or workspace better.
You'll need a cordless drill, impact driver, and a level. Clamps, a stud finder, measuring tape, and safety gear are also essential. Quality hardware like cabinet connector bolts and wood screws are necessary. Professionals use pocket hole jigs and cabinet jacks for upper installations.
Start by leveling your first base cabinet. This sets the foundation. Use shims for floor irregularities and check the level often. Clamp cabinets together for alignment and verify level before tightening.
Place cabinets with consistent spacing and clamp them for alignment. Drill pilot holes to prevent splitting. Install connector bolts or screws to secure them tightly. Make sure faces are flush and maintain consistent gaps between doors.
Find wall studs with a stud finder and mark them. Use temporary supports like cabinet jacks or ledger boards. Secure cabinets to studs with screws, then connect adjacent cabinets using the same method.
Use wood screws with pilot holes for solid wood and plywood. For particle board and MDF, choose screws designed for engineered materials. Frameless cabinets may need different hardware and connecting systems.
Small gaps can be fixed by loosening and repositioning cabinets. For larger gaps, use filler strips or trim. Shims can help with cabinet alignment if gaps are due to manufacturing tolerances.
Start with upper cabinets to avoid working over base cabinets. Begin with corner units and work outward. Install base cabinets next, starting with corners and following the sequence.
Corner cabinets need precise measurements and specialized hardware. Install corner units first, then connect adjacent cabinets. Lazy Susan installations require attention to door clearances and smooth operation.
Always wear safety glasses and work gloves. Use proper lifting techniques and get help with heavy cabinets. Keep your work area clean and well-lit. Use temporary supports for upper cabinets and never work alone.
Choose the right fasteners for your cabinet's construction and load. Ensure weight is distributed across multiple mounting points for upper cabinets. Use quality hardware and avoid overloading cabinets.
Misaligned doors often mean positioning issues, not hardware problems. Check if cabinets are level and properly connected. Adjust hinges as needed, but fix any underlying installation issues first.
Kitchen islands need floor attachment since they lack wall support. Use the right floor fasteners for your flooring type. Plan for electrical and plumbing integration during installation, and consider adding reinforcement for heavy countertops.


Share:
How to Extend Cabinets to Ceiling: A Complete Guide
How to Fix Kitchen Cabinets: Essential Repair Guide